My walk-in closet is beginning to take form! We’re lastly attending to the thrilling stuff as my drawings and mockups are beginning to turn out to be actuality. I nonetheless haven’t put in any trim or molding (which, in fact, is when the room will actually begin to go from ugly fundamentals to fairly), as a result of I noticed that I used to be type of getting forward of myself. Earlier than I can begin including trim and molding, I first need to get all the cabinets and dividers in place.
So I spent my total weekend chopping plywood for cabinets after which doing all the wooden filling and sanding on these cabinets (which I’ve to do as a result of I used a lesser grade of plywood in an effort to save cash).
Final Friday, which was the final replace I confirmed y’all, I had all however two of the cupboard containers constructed. On the suitable facet of the room, I had two of the containers in place and screwed collectively, however the different two seemed like this…
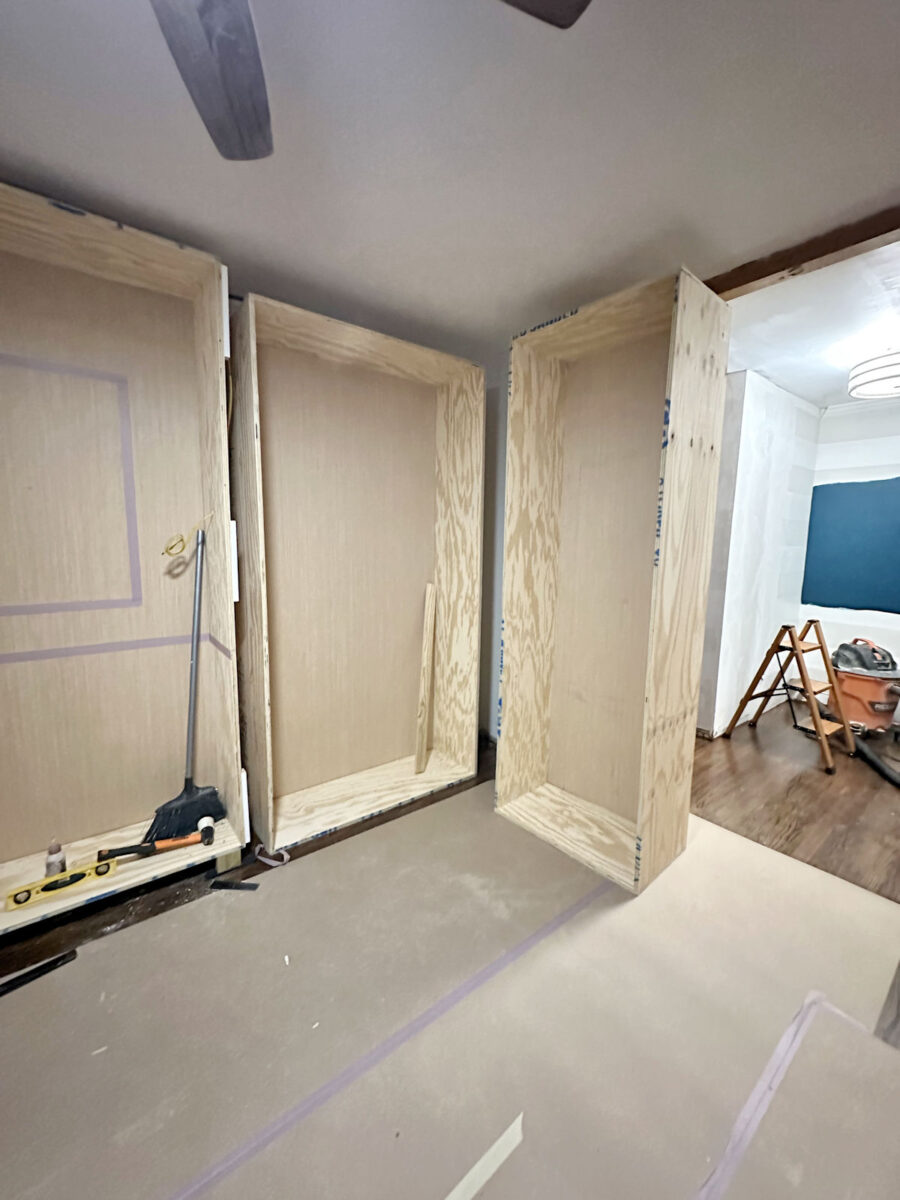
After which I received the ultimate two cupboard containers constructed for the left facet of the room.
So now all the cupboard containers are constructed. I nonetheless don’t have ft on a number of of them, and the cupboards on the left facet are nonetheless not screwed collectively. However no less than they’re constructed and in place for probably the most half.
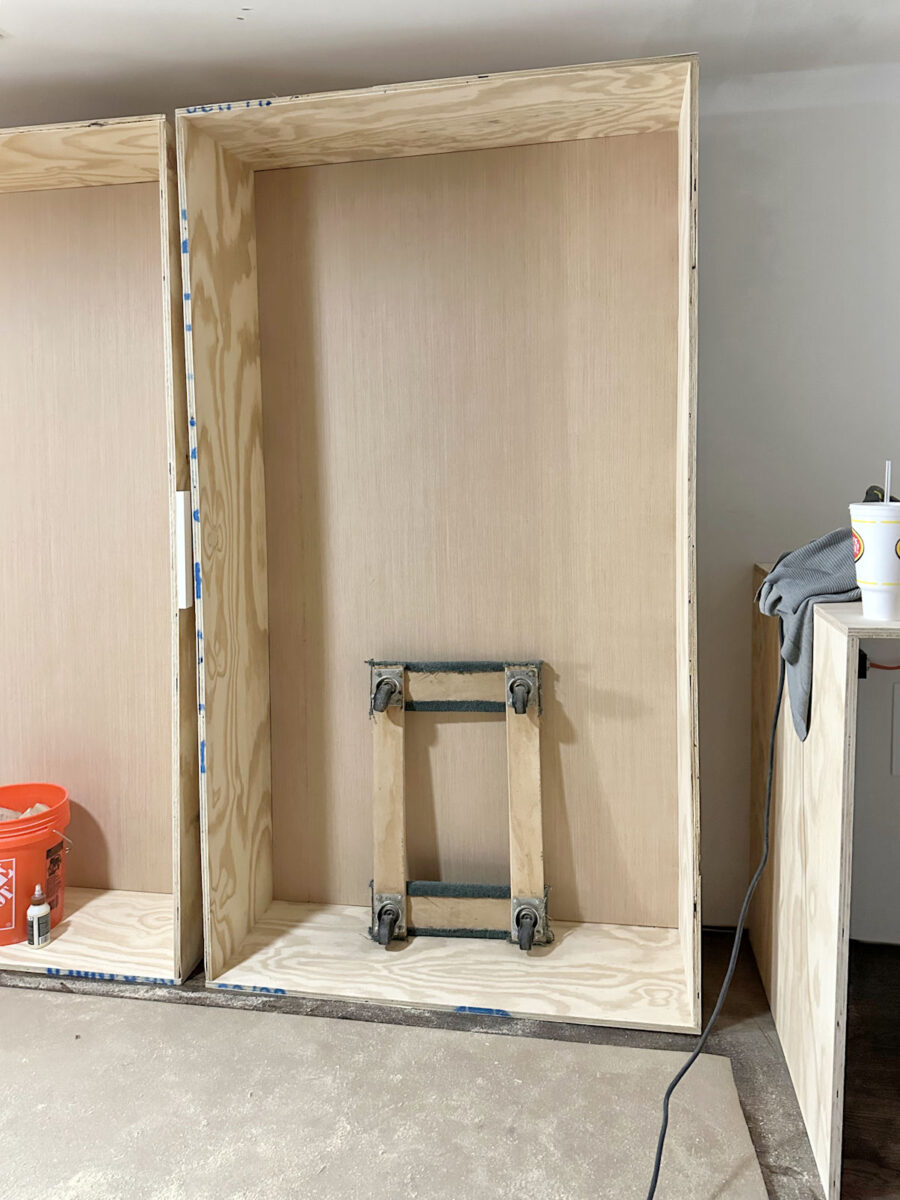
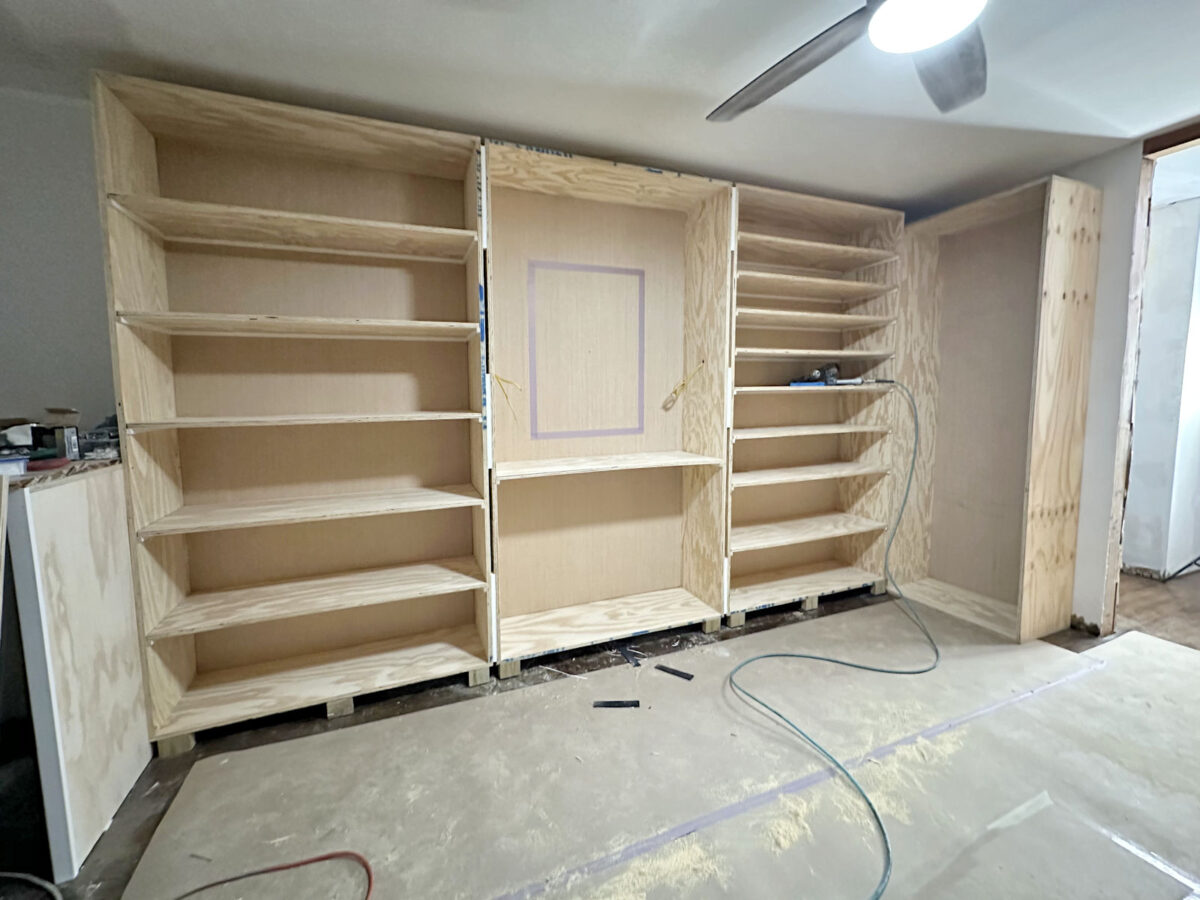
With all the containers constructed, I used to be prepared to begin including all the cabinets. I began with the suitable facet of the room as a result of that’s the facet that has probably the most cabinets, so I wished to sort out that facet first.
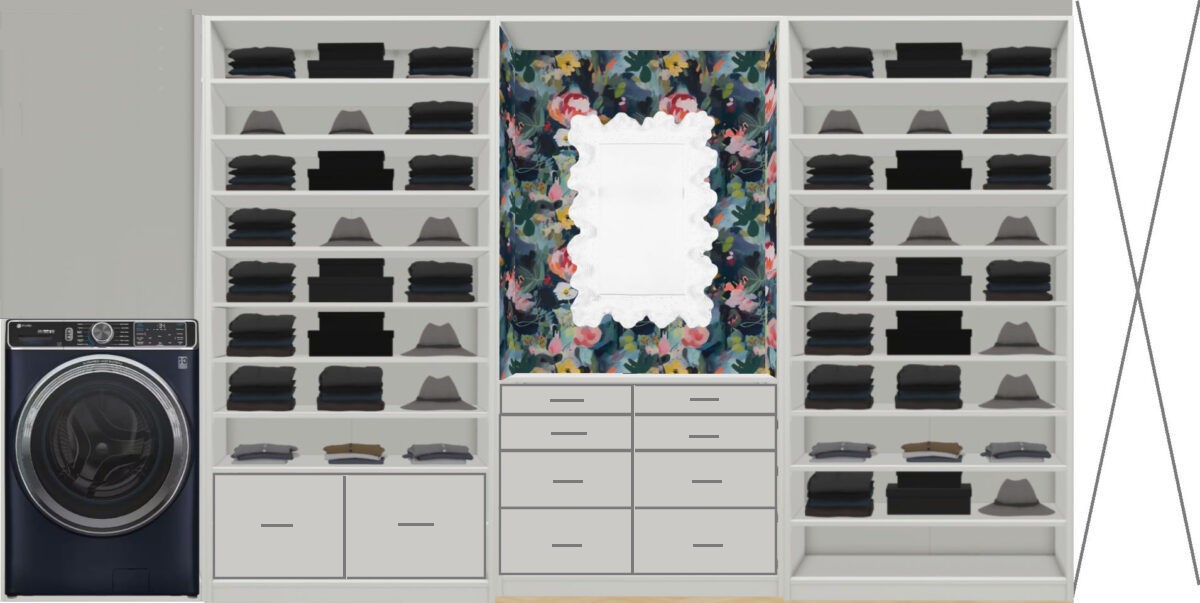
I began with the cupboard closest to the washer. To carry the cabinets in place, I ripped strips of 1″x2″ lumber (which is definitely solely 3/4″ thick and never 1″ thick) to three/4″ x 3/4″ utilizing my desk noticed, after which I lower them with my miter noticed to the suitable lengths. I connected these strips utilizing 16-gauge 1.25″ nails to type the helps for the cabinets, and I spaced these 14 inches aside. These cabinets will likely be for purses and folded garments. By this level, I had already designed my middle island (which you’ll be able to see right here: Designing My Closet Island), so I had already determined that the underside part wouldn’t have drawers. This cupboard will likely be all cabinets.
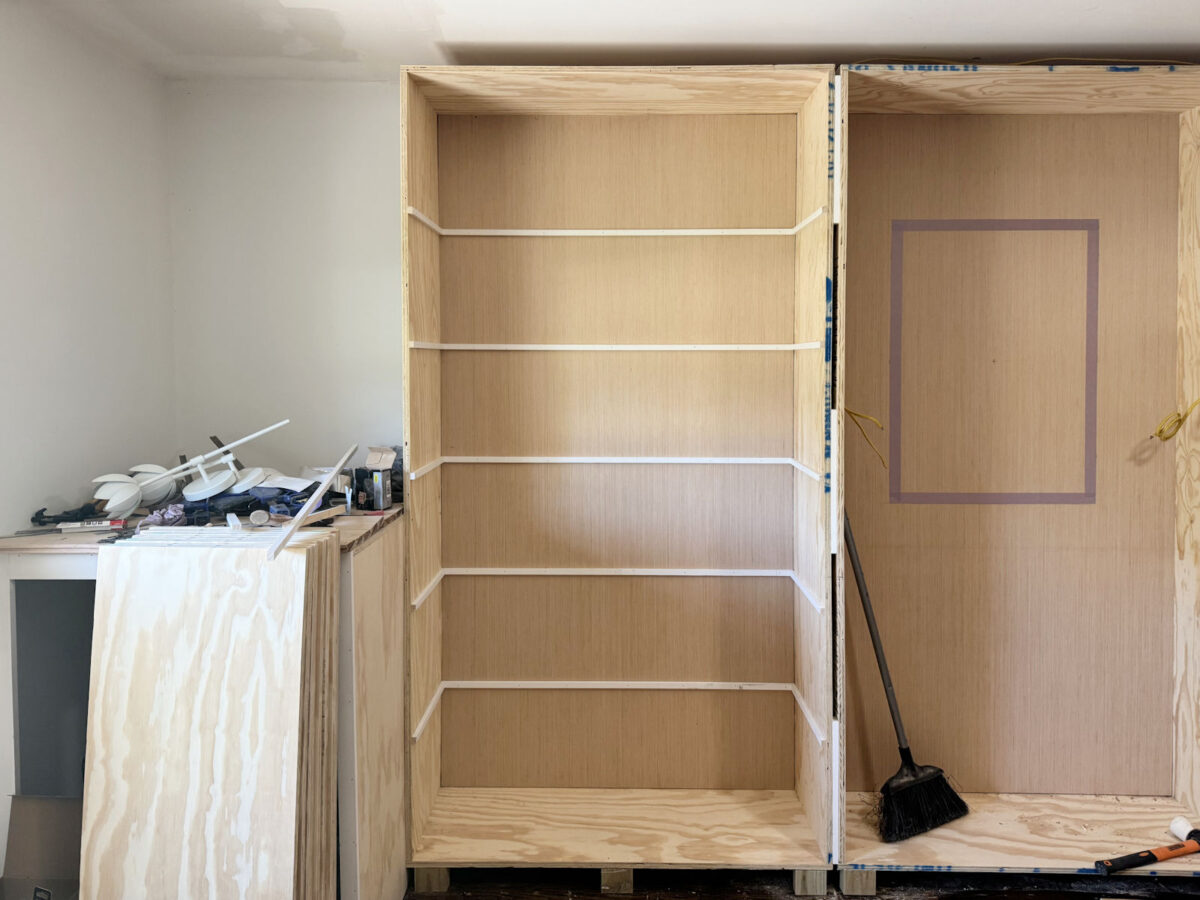
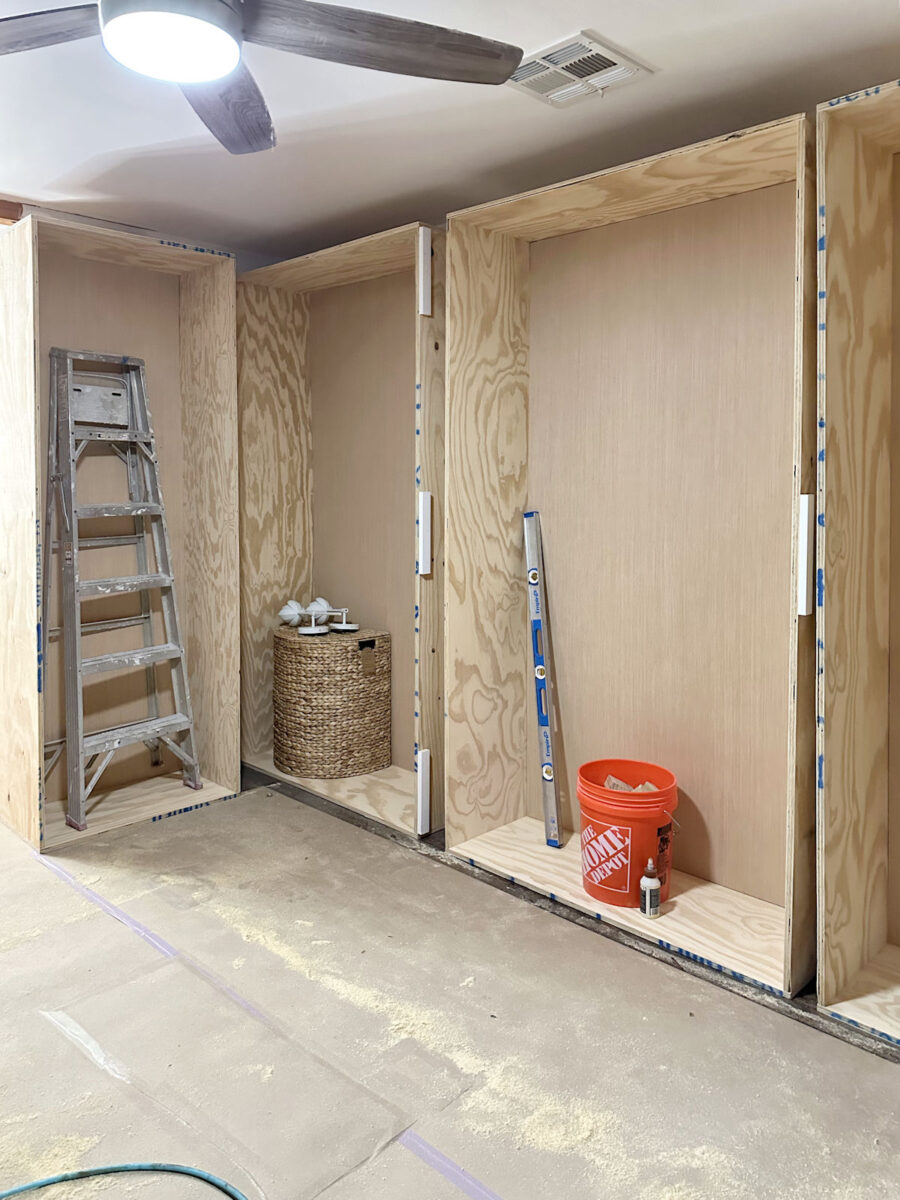
After which with the helps in place, I added the plywood cabinets and nailed them into place utilizing the identical 16-gauge 1.25-inch nails, beginning with the underside shelf and dealing my approach to the highest. I nailed the cabinets in place by nailing via the highest of the plywood and into the helps at a slight angle in the direction of the perimeters and again of the cupboard.
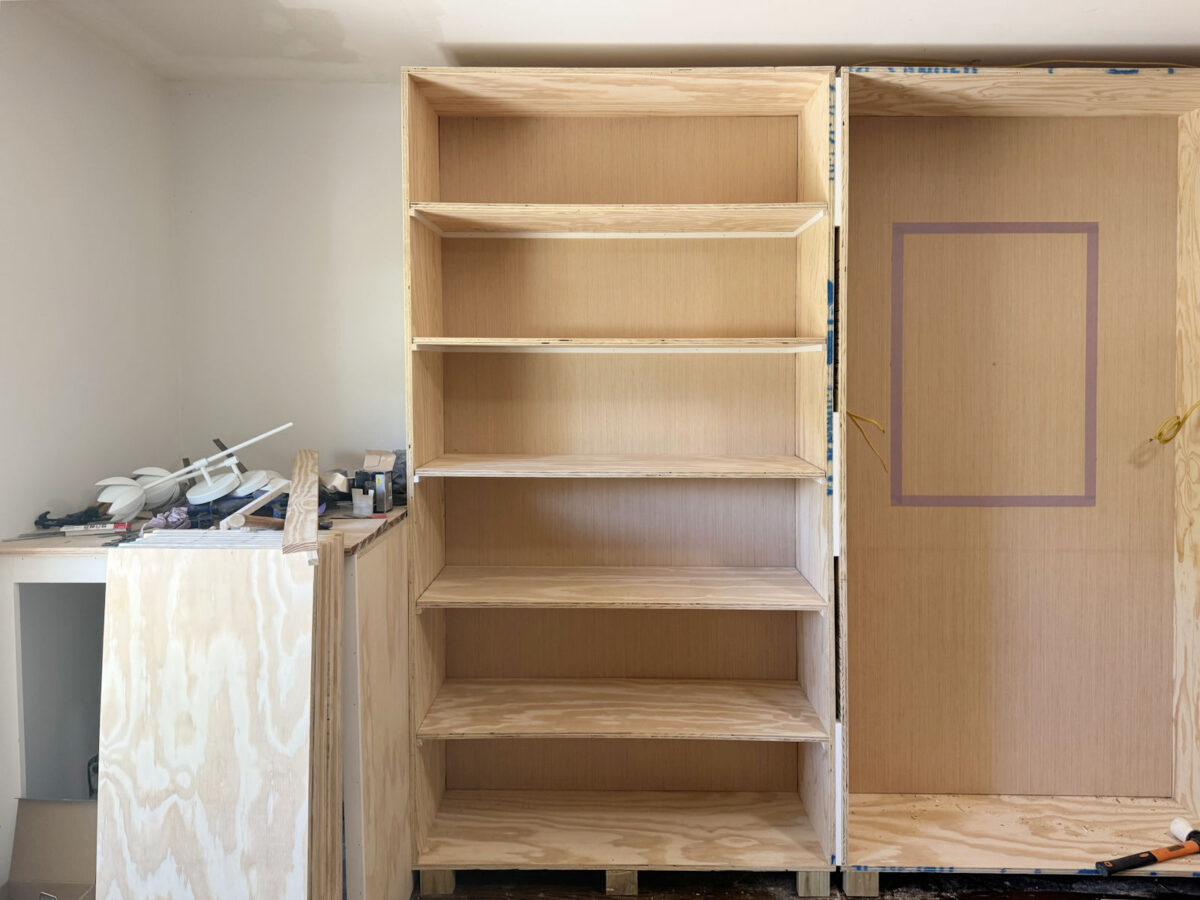
Subsequent, I added the plywood for the countertop within the center part, after which I added the ft to the third cupboard, received it screwed into place, and added the cabinets to that cupboard in the identical method.

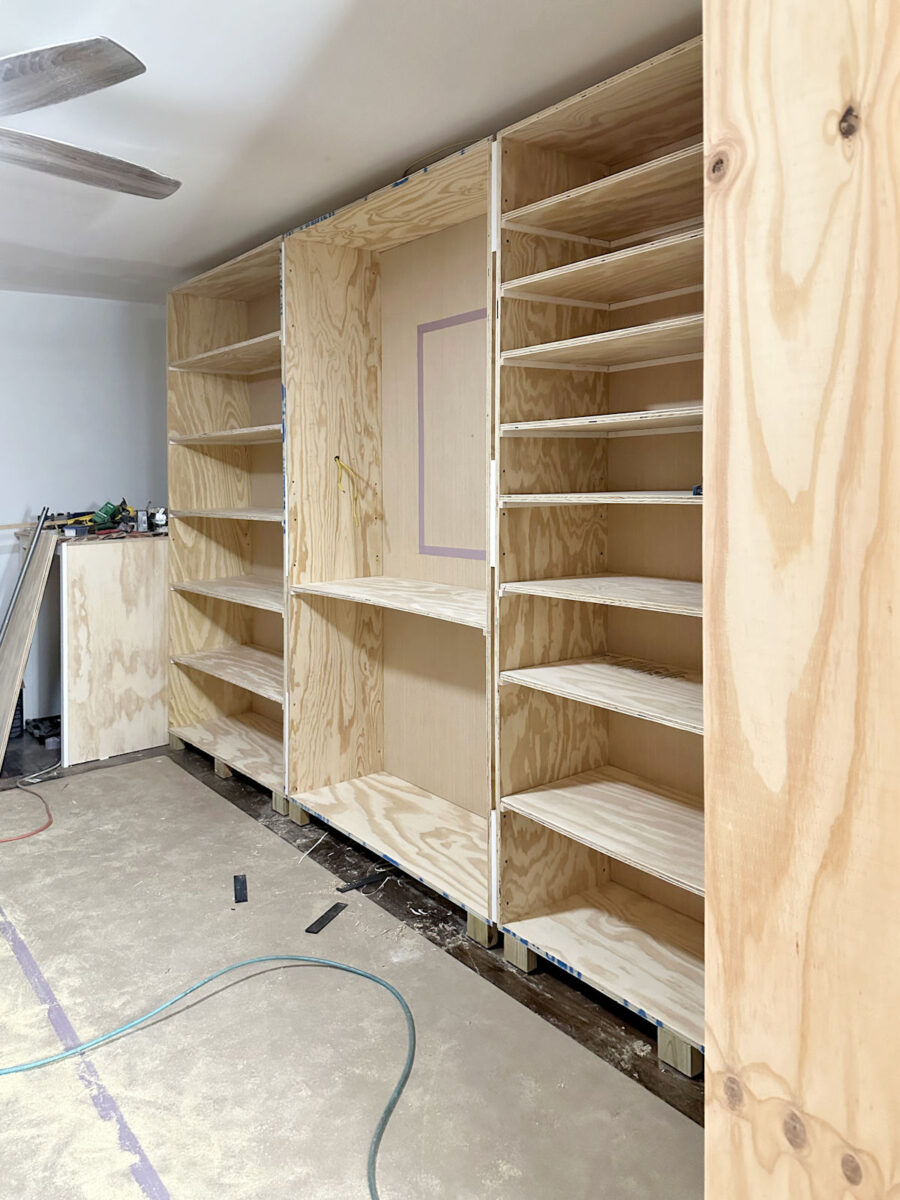
That total proper cupboard goes to be shoe storage, so after taking plenty of measurements of my footwear, I made a decision to place two taller 14-inch cabinets on backside for taller footwear like boots, after which I did two 10-inch cabinets for footwear with greater heels, adopted by two 8-inch cabinets for footwear with smaller heels, after which three 7.5-inch cabinets for residences. As soon as the trim is on the highest of the cupboards (and if I did my math accurately, which is at all times questionable 😀 ), these three cabinets on the high will look rather more equal in top.
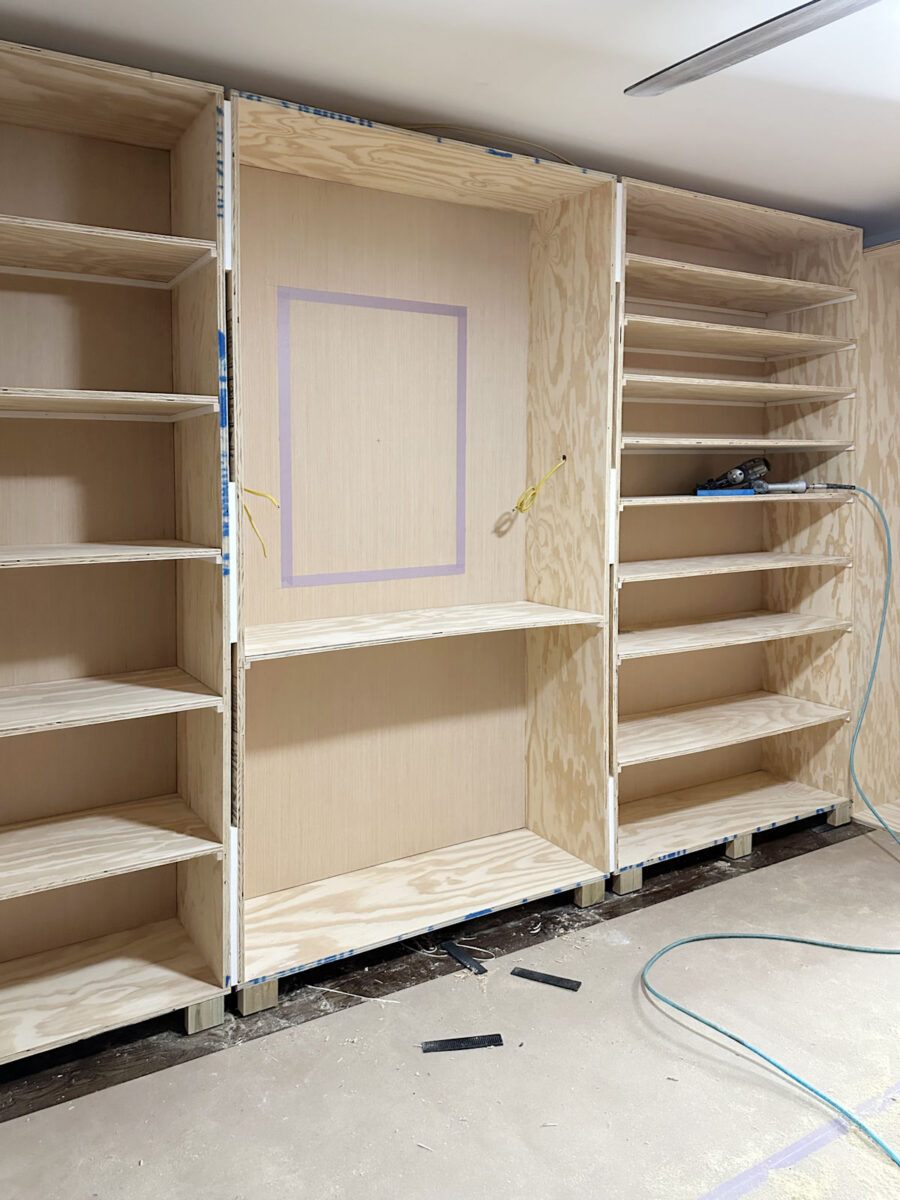
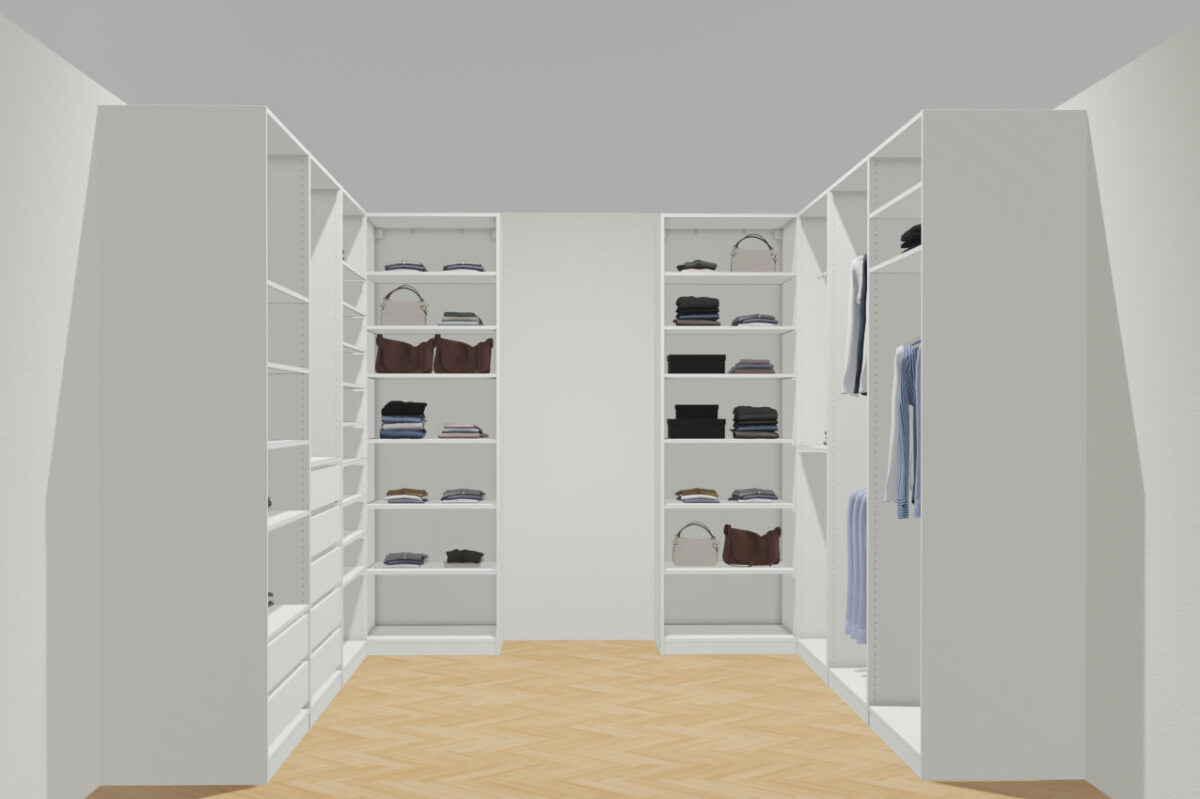
So right here’s how that wall appears to be like as of final evening…
However within the meantime, I used to be studying all of your comments and feedback on yesterday’s post about the closet island design, and I made a decision to take away that shelf within the center part the place the mirror and wallpaper will go and add my glass high jewellery drawer in that part with my necklace bar slightly below it. The necklaces nonetheless gained’t be at eye degree, however I do assume a few of you made a really compelling argument that having them on that wall with the mirror makes rather more sense. And I’m very quick, so I don’t assume having them slightly below the very shallow earring/ring drawer will likely be an issue for me.
And since I’m going to have that earring/ring drawer there with the necklace storage/show slightly below, I’m simply going so as to add a shelf on the backside of that part additionally. So mainly, each little bit of the drawer storage within the room will likely be concentrated to the island, and all the facet partitions will likely be hanging and shelf storage.
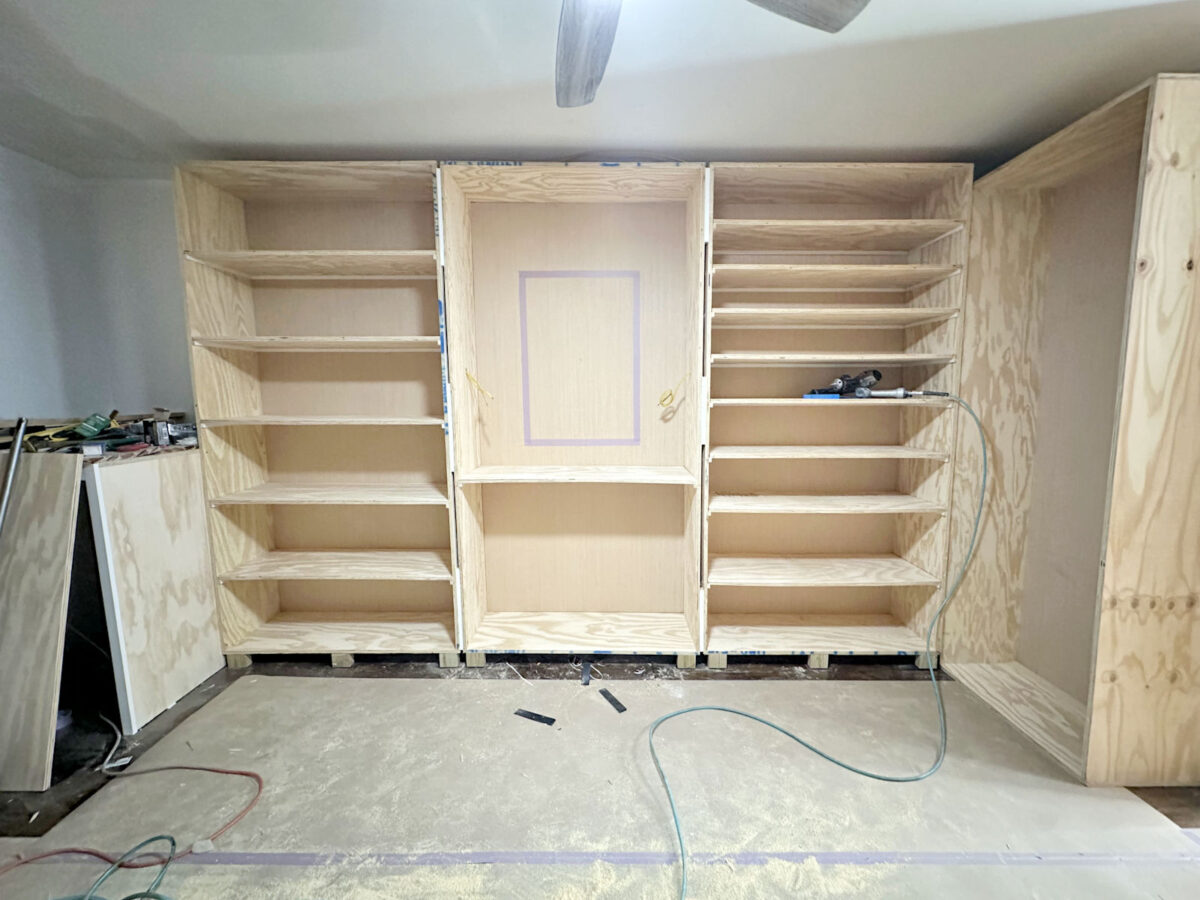
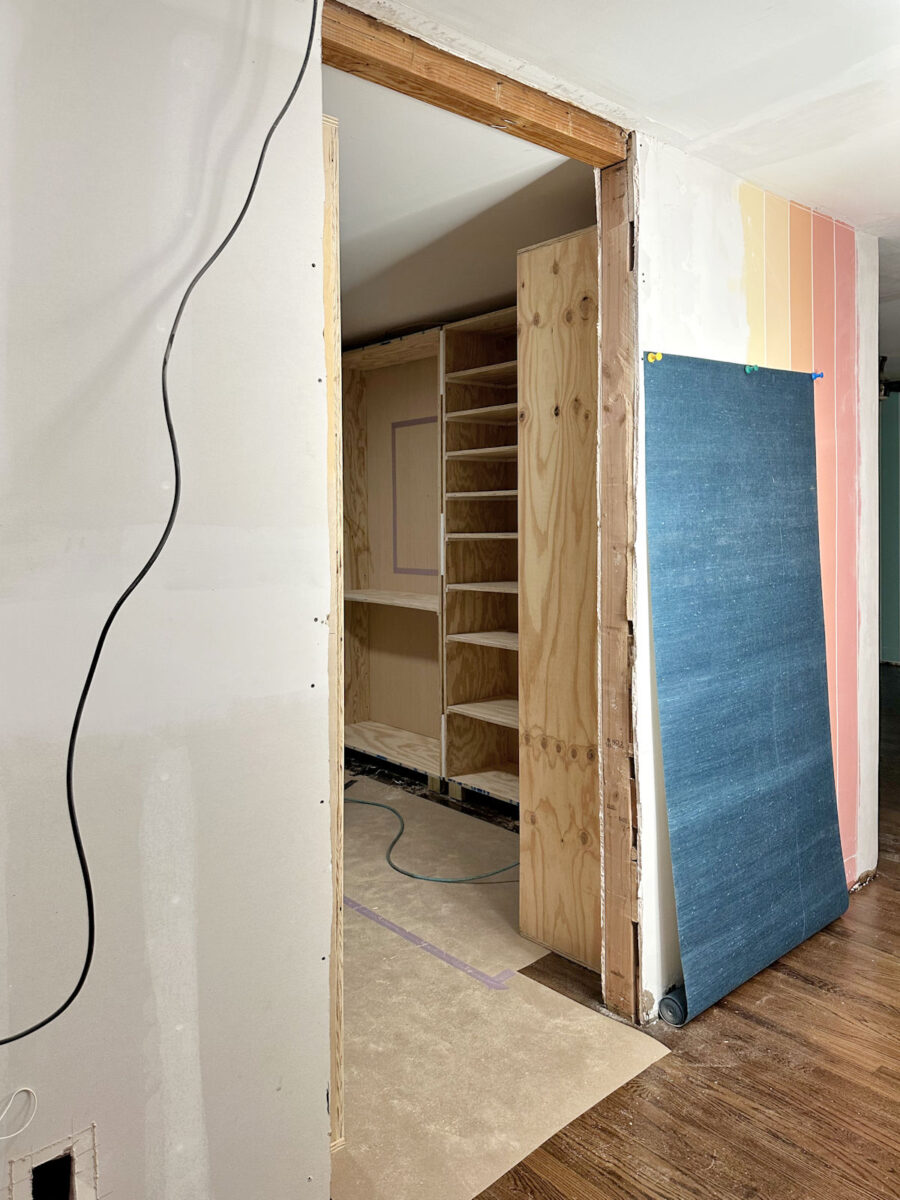
Right here’s a peek at what it appears to be like like so removed from the doorway of the bed room suite.
I’m fairly excited concerning the progress, and it’s so thrilling to see this room turn out to be a actuality. I’ve heaps extra cabinets to chop, wooden fill, and sand earlier than I can get to the trim. However fortunately, the left facet of the room solely wants 4 cabinets and one vertical divider. That can take quite a bit much less time than the 14 cabinets required for the suitable facet of the room.
After which I’ll want to chop and end 10 to 12 cabinets for the 2 cupboards flanking the door. These two cupboards could have doorways on them in order that I’ve some closed storage within the room.
So I’m solely about midway completed with including the cabinets, however I’ve one other uninterrupted workday forward of me. I’m hoping to complete the remaining by the top of the day. I could not get them fully completed at this time, however I’m going to strive my hardest to get as a lot completed as doable.
I’m drained, y’all, however I’m additionally feeling fairly motivated to get to the beautiful stuff. I’m so shut! However a part of me needs I might commerce locations with this candy woman for a day and simply lounge round the home and eat and play. 😀 However there’s no time for that proper now.
The A2D Day by day:

Addicted 2 Adorning is the place I share my DIY and adorning journey as I rework and embellish the 1948 fixer higher that my husband, Matt, and I purchased in 2013. Matt has M.S. and is unable to do bodily work, so I do nearly all of the work on the home on my own. You can learn more about me here.
Trending Merchandise