
I do know we’re all anxious to see my closet painted, and I’m getting nearer and nearer to that on daily basis. I’ve been caught in these paint prep steps for days now, and I’d love nothing greater than to see that stunning blue-green coloration go on these cupboards. However all of those steps I’ve to do earlier than portray actually are an important components of the method.
Sadly, it looks as if these are the steps that most individuals wish to skip over. I’ll always remember when the Chalk Paint craze took over years in the past. One of many promoting factors was that you just don’t need to sand earlier than portray. You might simply slap that paint proper over any end, and it will look stunning, or so we have been advised. That drove me loopy, as a result of the very fact of the matter is that in the event you slap paint on a tough floor or a floor that hasn’t been prepped in any means, your paint end goes to look terrible. The painted floor can solely look pretty much as good because the floor beneath it. Paint doesn’t magically make cracks, holes, uneven surfaces, tough surfaces, or different imperfections disappear.
And that’s precisely why I take a lot time within the prep stage earlier than I paint something, whether or not it’s a chunk of furnishings, cupboards, or the rest. One among my favorite people to follow in Instagram is Kayla Payne. She paints cupboards and furnishings, and her strategy is similar to my very own. I watched the entire technique of her portray her personal kitchen cupboards not too way back, and that was nearly a month-long course of for her simply to color her kitchen cupboards. She did an excellent excessive gloss end, which takes even longer and much more consideration to element that what I’m doing in my closet, however due to all of that focus to element, her end turned out wonderful.
Anyway, all of that to say that I do know I’m caught within the tremendous boring a part of this mission, but it surely’s not a section that I can rush by. Neither is it a section that I wish to rush by as a result of if I don’t take the time to do these steps accurately and take note of the small print, the completed mission will appear like an affordable DIY mission. And that’s the very last thing I need.
So yesterday, I labored all day lengthy, from round 10:00am to 10:30pm, with an hour break for lunch. And I spent that entire time sanding after which doing a little bit extra priming. And nearly the entire sanding I used to be doing yesterday was by hand.
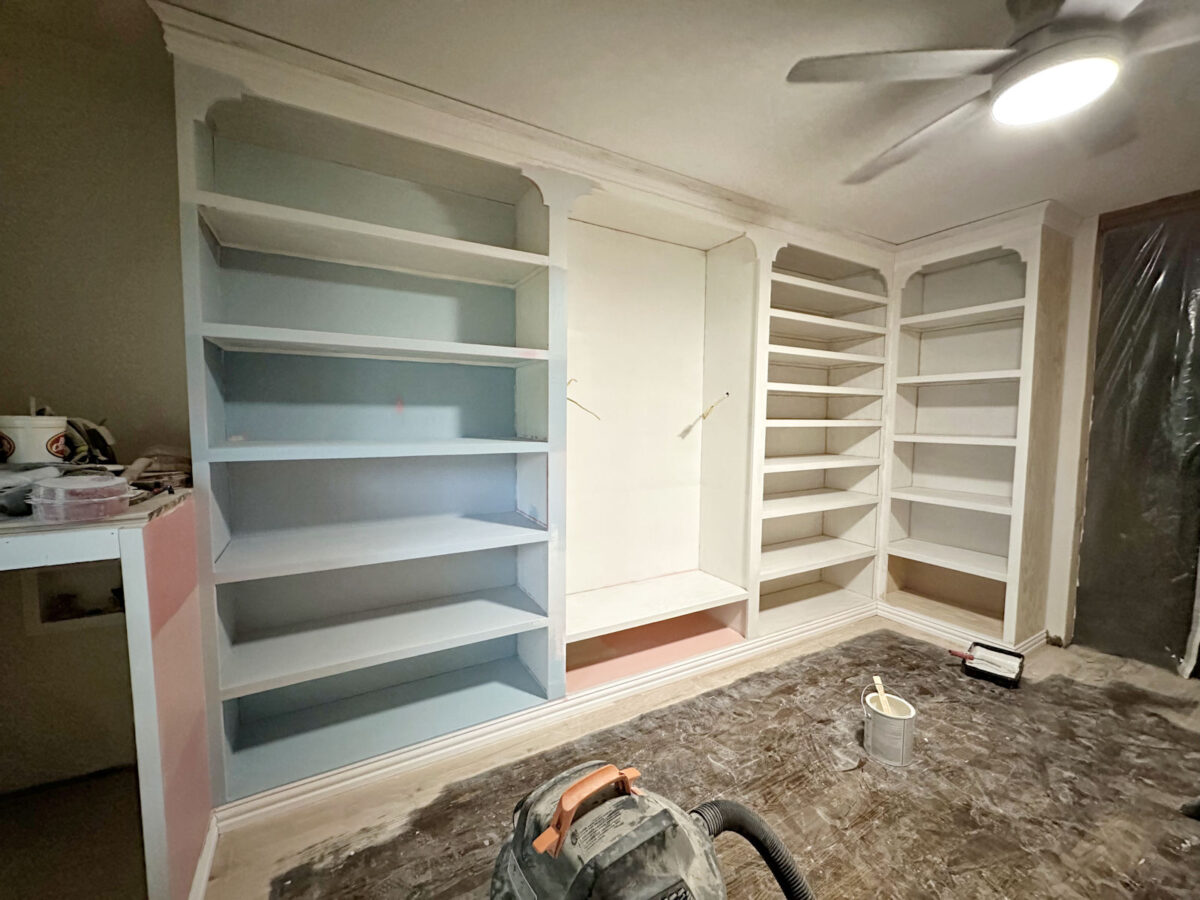
My aim was to take off the sharp edges from the entire trim items. And I don’t know in the event you’ve observed, however there are numerous cabinets on this room, which signifies that there are a complete lot of trim items that wanted to be sanded.
I take the time to do that on all of my initiatives that I construct for 2 causes. First, I feel it appears to be like higher. However second, the manufacturing facility minimize edges on this pre-primed lumber is so sharp that it might actually minimize you in the event you run your hand throughout it quick sufficient. Ask me how I do know that. 😀 However actually, I simply don’t like the way it appears to be like.
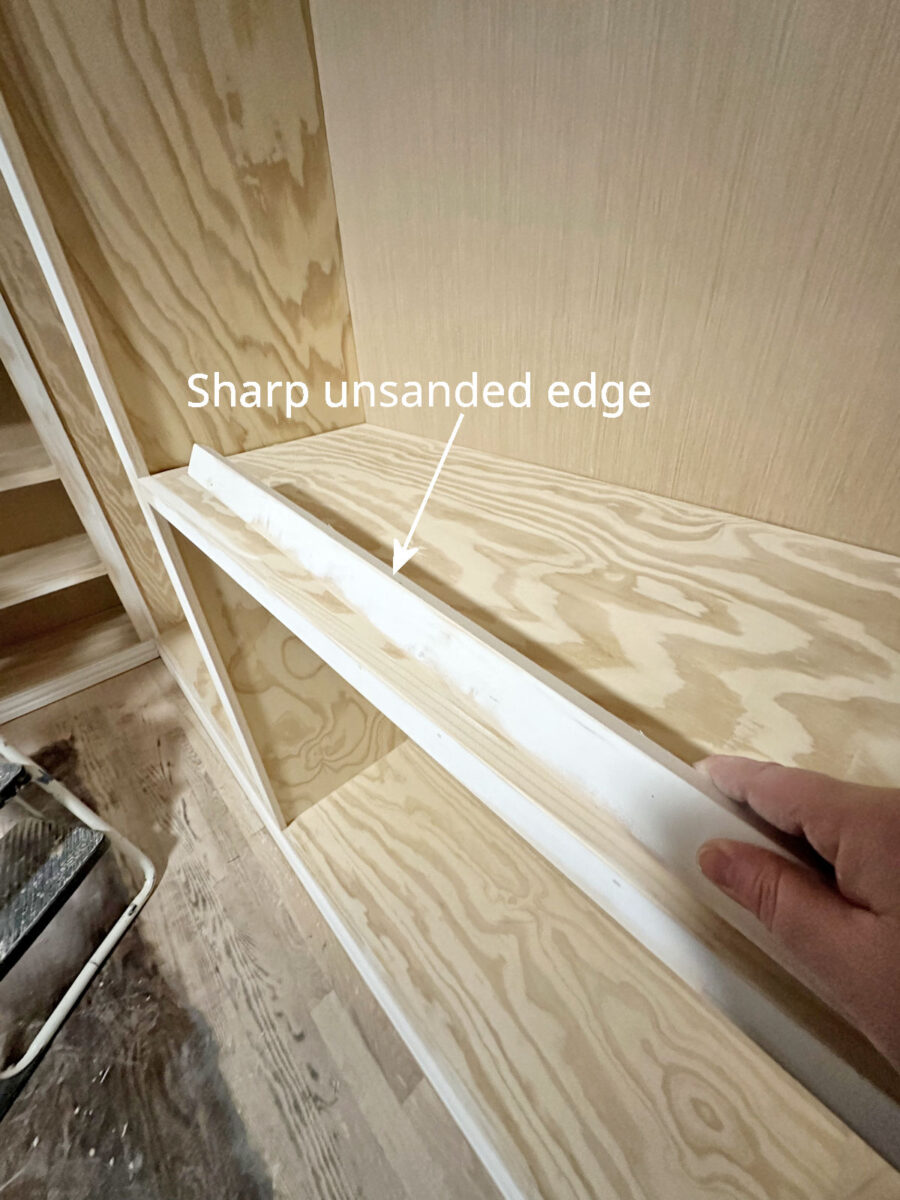
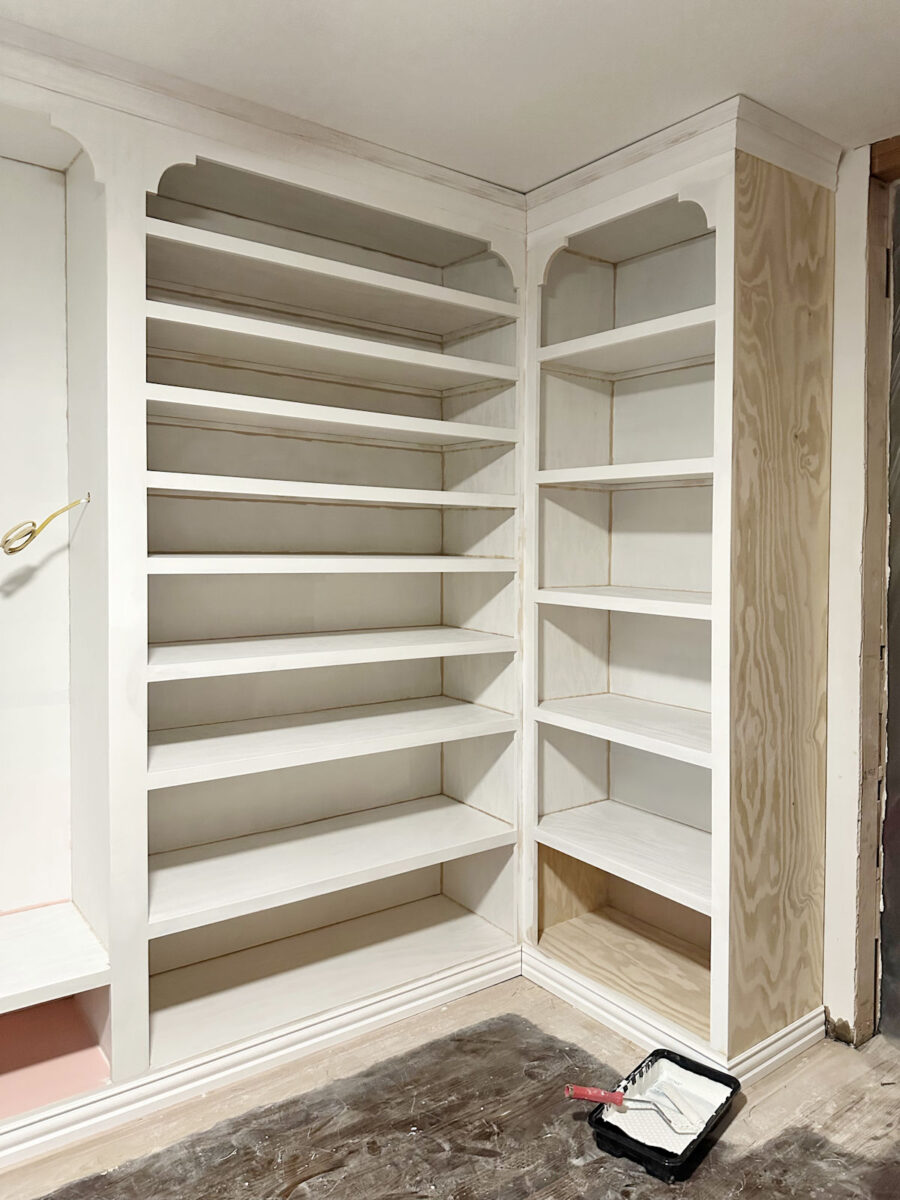
So I begin with 80-grit sandpaper to knock down that tremendous sharp edge, after which comply with up with 120-grit after which 220-grit sandpaper to get a softer rounded-over edge, which you’ll see under.
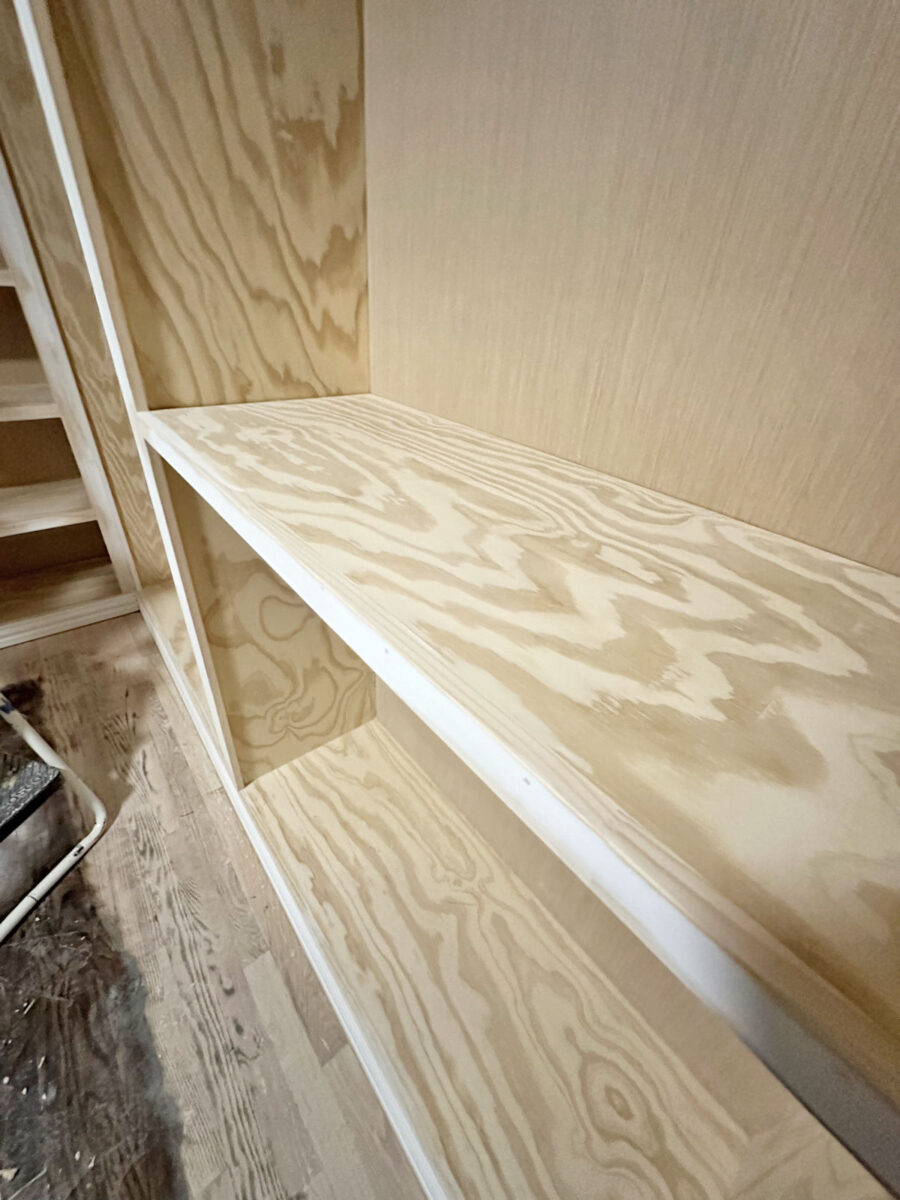
It’s a type of small particulars that I feel makes an enormous distinction within the completed mission. And whereas I often is the just one who ever notices, that’s sufficient for me. It’s typically onerous to inform the distinction earlier than it’s primed and painted. Right here’s what it appears to be like like after doing all of that sanding however earlier than priming…
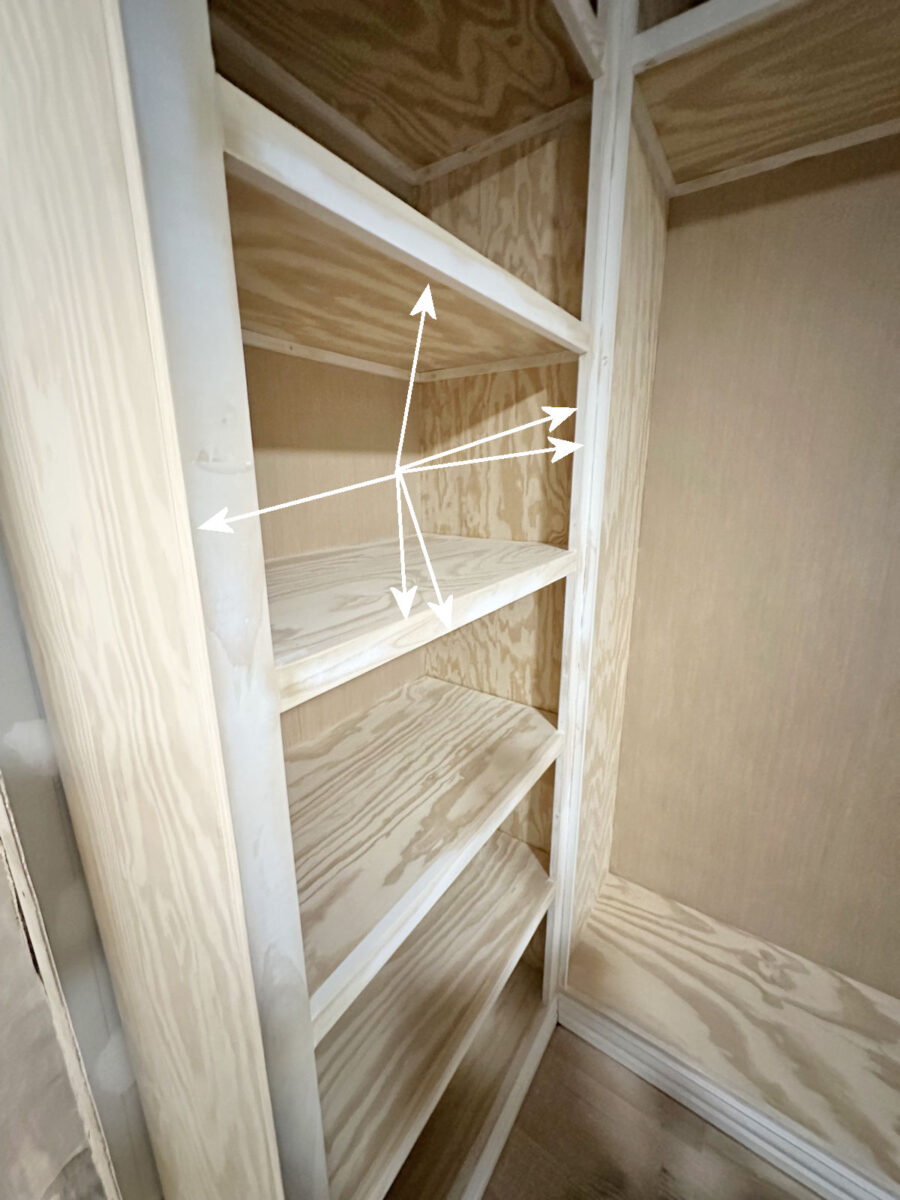
However the motive it took so lengthy is as a result of I do all of this by hand. Utilizing a sander for this course of can depart gouges within the items subsequent to the piece I’m sanding, and it might additionally take off an excessive amount of of the nook too quick and depart uneven corners. I’ve way more management if I do it by hand. And this step must be completed after the entire cabinets and shelf trim have been hooked up. You don’t wish to spherical over the perimeters of the cupboard trim after which add the trim on entrance of the cabinets as a result of that may depart a spot between the 2 items that then needs to be crammed and sanded.
And it additionally took so lengthy as a result of there’s simply a lot of it. I sand each single one of many uncovered edges. And once more, I’ve a complete lot of cabinets and numerous cupboard trim on this room.
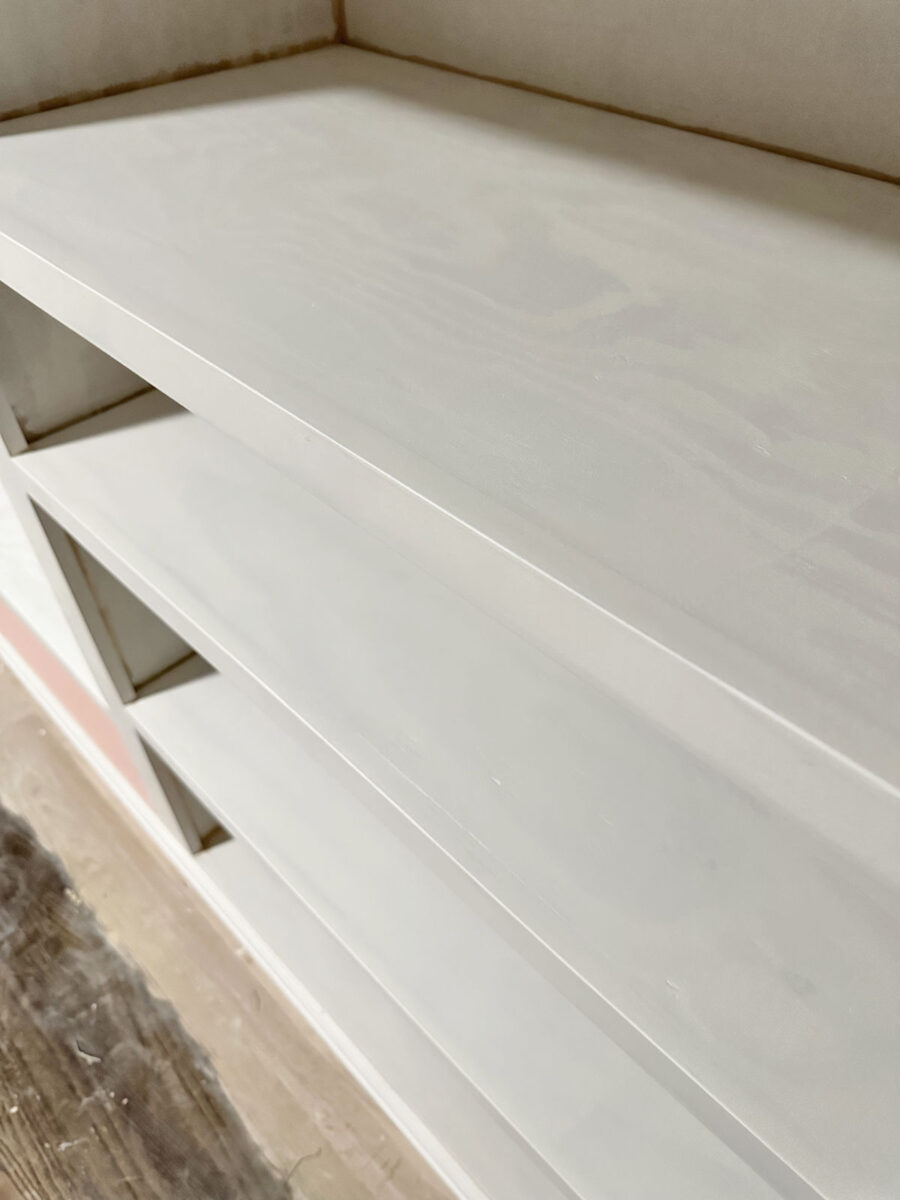
The excellent news is that I lastly obtained that lengthy and boring course of completed at about 9:00 final night time, after which I spent the remainder of the time till I went to mattress priming the precise aspect of the room. I needed to snigger as a result of I ran out of primer earlier than I might get that final shelf primed. I nonetheless must prime the entire corners with a brush, however I obtained (nearly) the entire areas primed that might be completed with a 6-inch curler.
I’ve one other full, uninterrupted workday forward of me right now, and now that each one of that preliminary sanding is completed, my aim is to get the remainder of the priming completed by the tip of the day. And sure, as soon as the primer is dry, I’ll sand each single bit of each floor with 220-grit sandpaper by hand earlier than I paint. As a result of, once more, the painted end can solely look pretty much as good because the earlier end. As soon as the primer is on, dry, and sanded, I’ll nonetheless must caulk, which is able to in all probability be an all-day job with this many cabinets. After which, lastly, paint!
So I’m nearly to the half that all of us wish to see, however in actuality, I’m nonetheless at the very least two full work days away from paint, if not three or 4. I nonetheless must construct my glass-top shelf as properly. The glass is out for supply proper now, and as quickly as I’ve that in hand, I’ll construct the body for it in order that it may be prepped, primed, and painted after I do the remainder of the cupboards.
Anyway, all of that to say that in the event you’re going to go to the difficulty of constructing cupboards, don’t rush the boring steps. They are surely an important. And in the event you’re wanting to color cupboards or furnishings, and your first query is, “How can I do that with out sanding?”, simply know that your completed mission may be very prone to find yourself trying like a DIY mission. In my 30+ years of DIYing, I’ve simply come to comprehend that sanding is among the most essential steps in portray cupboards and furnishings, and in the event you skip that step, it’ll present. It’s boring however essential.

Addicted 2 Adorning is the place I share my DIY and adorning journey as I rework and embellish the 1948 fixer higher that my husband, Matt, and I purchased in 2013. Matt has M.S. and is unable to do bodily work, so I do the vast majority of the work on the home on my own. You can learn more about me here.
Trending Merchandise


